Indirect Bonding tray Work flow
This article applies to NBEE, NBEE D, UBEE, Slash 2 Plus.
Part I: Work with model in UNIZ Dental V2 software.
Export the Indirect Bonding Tray from the design software to stl. format.
Open the Dental software, select the corresponding printer, and select Indirect Bonding Tray as the application type.
It is recommended to choose UNIZ resin.
Import IDB model.
Use the Align Bottom plane function to align the side of the IDB that does not touch the tooth to the bottom.
Slice the model.
Drag the block up and down to check if there are any faults or sudden appearances in the model.
Part II: Printing models
Ensure Optimal Working Conditions:
Place the printer on a flat, stable place, and make sure the wheels, build platform, and resin tank are securely locked.
Verify that the resin tank is within its lifespan and that there are no residues left on the build platform or in the resin tank.
Ensure that both the UI firmware and system firmware are updated to the latest version.
Thoroughly mix the zDental IDB resin before pouring it into the resin tank.
Use at least 100ml to prevent print failures due to insufficient resin.
Select the slicing file in the printer and initiate the printing process.
Part III: Post-processing (The processing method is the same, taking the orthodontic model as an example)
- Detaching.
- Detaching.
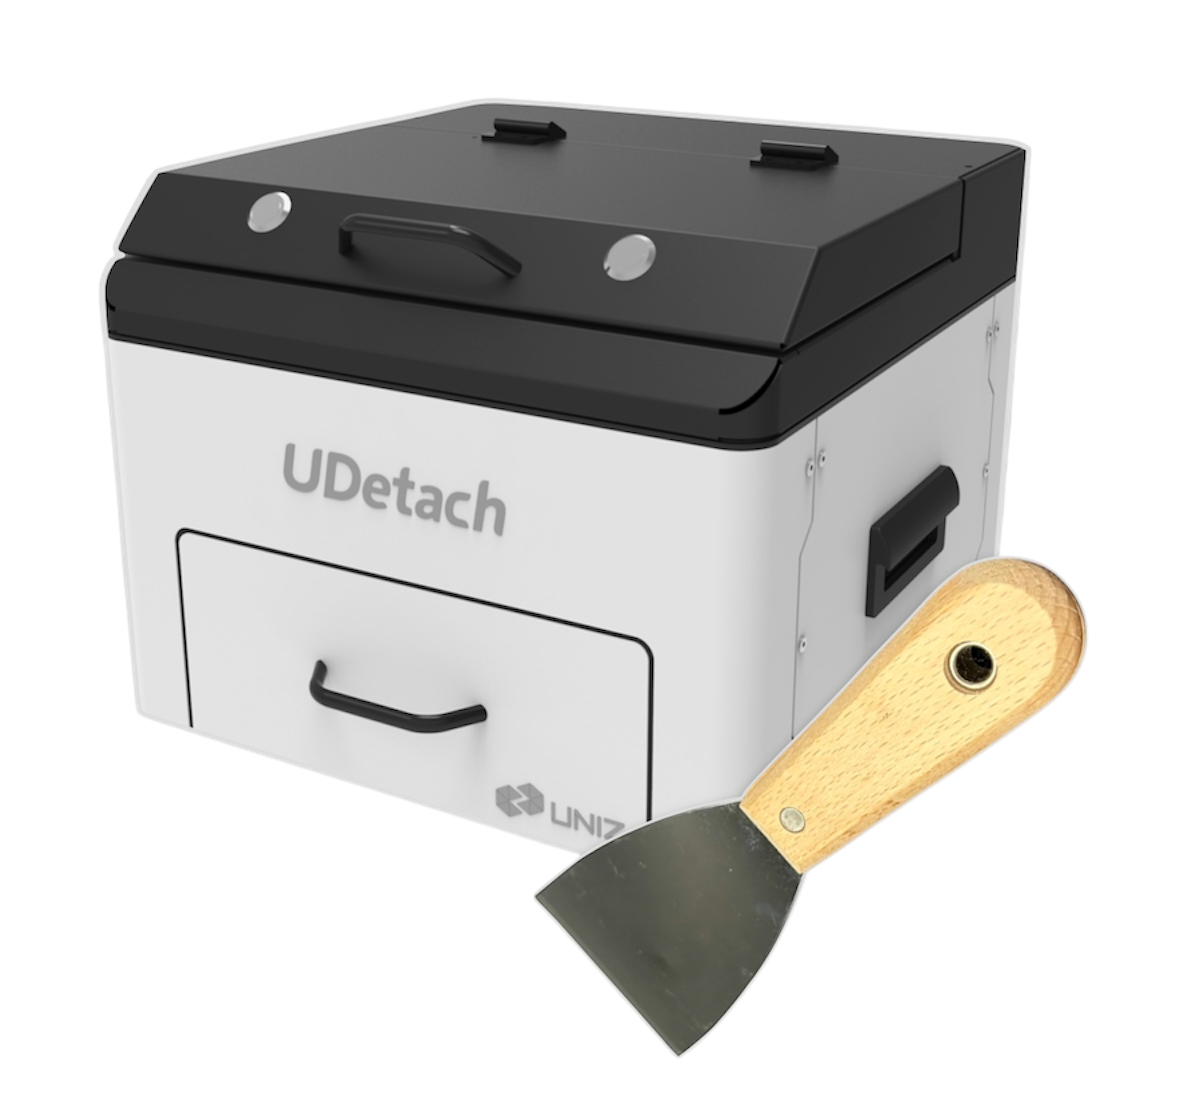
- Detach the printed modes from the build platform with UDetach (automatically), or with metal scrapper (manually).
- Cleaning
- Clean the printed models with UWash (UNIZ ultrasonic washer) and alcohol (greater than 90% concentration) or IPA for 1 minutes.

- Drying.
- Use a compressed air gun to blow dry for 3 minutes or let it sit to air dry for 30 minutes.

- Curing.
- Cure the printed parts with UCure (UNIZ curing machine). Select zDental Model XX resin settings (level 3, 1minutes for each side, totally need 2 minutes), then click Start.

- Detach the printed modes from the build platform with UDetach (automatically), or with metal scrapper (manually).
- Cleaning
- Clean the printed models with UWash (UNIZ ultrasonic washer) and alcohol (greater than 90% concentration) or IPA for 1 minutes.
- Drying.
- Use a compressed air gun to blow dry for 3 minutes or let it sit to air dry for 30 minutes.
- Curing.
- Cure the printed parts with UCure (UNIZ curing machine). Select zDental Model XX resin settings (level 3, 1minutes for each side, totally need 2 minutes), then click Start.
Related Articles
Splint 3D Printing Work Flow
This article applies to NBEE, NBEE D, UBEE, Slash 2 Plus. Part I: Work with model in UNIZ Dental V2 software. Select Printer model - Printer – Indication: Splint - Proper profile, and click on Next (take NBEE as an example). Select the corresponding ...Crown and Bridge 3D Printing Workflow
This article applies to NBEE, NBEE D, UBEE, Slash 2 Plus. Part I: Work with model in UNIZ Dental V2 software. Select Printer model - Printer - Indication: Temporary C&B - Proper profile, and click on Next (take NBEE as an example). Select the ...Dental Cast 3D Printing Work Flow
This article applies to NBEE, NBEE D, UBEE, Slash 2 Plus. Part I: Work with model in UNIZ Dental V2 software. Select Printer model - Printer – Indication: Dental Casting - Proper profile, and click on Next (take NBEE as an example). Select the ...Gingiva Mask 3D Printing Work Flow
This article applies to NBEE, NBEE D, UBEE, Slash 2 Plus. Part I: Work with model in UNIZ Dental V2 software. Select Printer model - Printer – Indication: Gingiva Mask - Proper profile, and click on Next (take NBEE as an example). Select the ...Custom Tray 3D Printing Workflow
This article applies to NBEE, NBEE D, UBEE, Slash 2 Plus. Part I: Work with model in UNIZ Dental V2 software. Select Printer model - Printer – Indication: Custom Tray - Proper profile, and click on Next (take NBEE as an example). Select the ...